Week 5 (Compositing Practice Exercise 2)
Let's create a penguin
Start by creating a new document.
File > New
Let's set the size to 7 inches by 7 inches at 200 dpi. Drop a center horizontal guide and a center vertical guide. You pull the guides out of the rulers at the top and left of your image. If there are no rulers showing go to
View > Rulers
Now we want to put a fill color in the background. Up at the main menu, go to
Select > All
Click on your background color swatch a pick a color. Blue looks good. Once you have your color chosen, press delete on the keyboard.
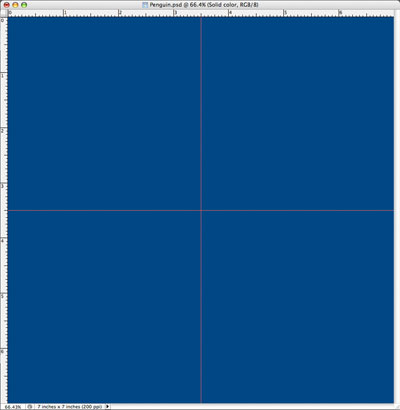
Create a new layer and call it body.
Layer > New > Layer
Choose your elliptical marquee tool. Make sure the mode that the tool is in is "New Selection" mode in your options bar and make sure the feather value is set to 0 and of course, like always, make sure you're on the body layer.
What we want to do now is draw an oval for the body of the penguin. We also want him centered, so start from the center of your guides. While holding [alt] on a PC or [option] on a Mac, click and start dragging out to form your oval. If it's not to your liking after you draw the selection, no problem, just draw a new selection by repeating the process. You can use your paint bucket to fill the selection or
Edit > Fill...Choose black as your color, Mode set to Normal and Opacity set to 100%. OK.

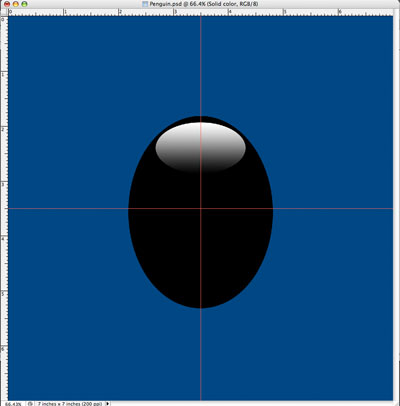
Next we want to create a reflection spot on his back. For this we want to create another layer called reflection. You already know how to do this part so go ahead.
Now, the same as last time, lets draw a selection with the elliptical marquee from the center point out again, this time drawing more of a horizontally squished oval. Once your happy with the selection you'll have to move it up. If you move your cursor inside of the selection you will notice that the cursor changes slightly. It will now serve as a move selection type of tool. So you can grab the selection and move it up. If you hold [Shift] while you move, it will lock the vertical, horizontal and 45 degree movements for you.
Once the selection is in place we want to fill it with a white to black gradient. First set your foreground and background color to be black and white. It doesn't matter which is which. Choose the gradiant tool from the toolbox. Now click on the small gradient sample in the options bar. Choose from the presets, "Foreground to Background". OK. Before you drag across your selection with the gradient tool to create the gradient, make sure of a few items in your options bar. Make sure linear gradient is the type chosen for the tool. Make sure the mode is normal and the opacity is 100%. Now draw out your gradient by dragging across your selection. If it doesn't give you the desired result, just undo and draw another one until you are happy with the results.
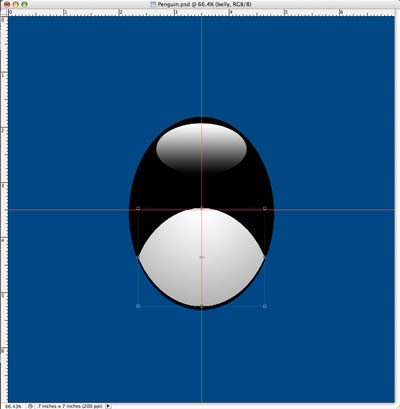
Next, we need to create the white belly. Duplicate the 'body' layer.

Layer > Duplicate... Give it the name 'belly'. OK. Now we need to make the oval white. Make sure you're on the 'belly' layer. Choose the magic wand tool and click on the oval. Now fill it with white.
Edit > Fill...set white, Normal, Opacity 100%. OK.
I used a bit of a white to grey gradient on mine for a little bit more of a 3D look.
Now choose the move tool and move the white oval about halfway down. We need to trim off the excess white part of the oval. Choose the 'body' layer and click with the magic wand tool in the background area. Now switch to the 'belly' layer and press delete on the keyboard. This will remove the overhanging white area. Now lets switch back to the Move tool and just nudge the 'belly' area up a bit so we create a bit of a black outline along the bottom. You can use your arrows on the keyboard to move the area.
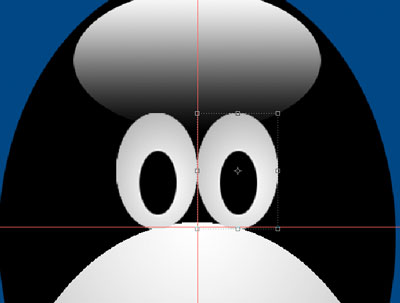
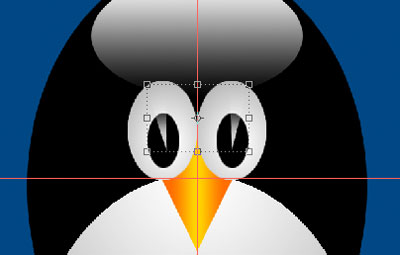
Now lets make the eyes. Make a new layer called, you guessed it 'eye'. Make your oval selection and fill it with white or to give a a more 3D look, a white to grey radial gradient. now make a smaller oval selection for the pupil and fill it with black.
To create the second eye, just duplicate the 'eye' layer and then with the move tool, move the duplicate eye over.
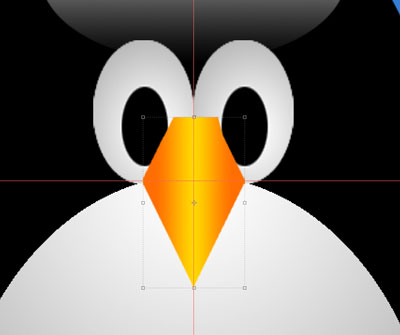
Make a beak layer. For the beak we can use the polygonal marquee to create our selection. Draw out the area we want to be the beak. Fill it with a color or even a yellow to orange gradient. Once you have the beak colored, we'll have to re-arrange the layers so that the beak is underneath the eyes, but above the white belly.
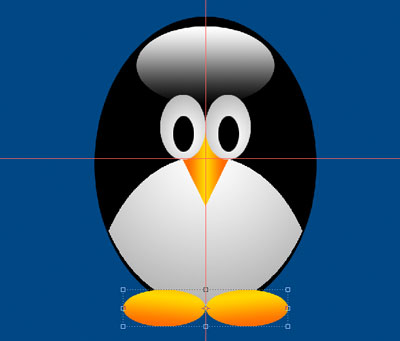
To make the feet, create a new layer, select your oval and fill it with a color or gradient. Duplicate that foot to make a second one. Use your move tool to adjust positioning. Use
Edit > Transform... to make adjustments to the shape.
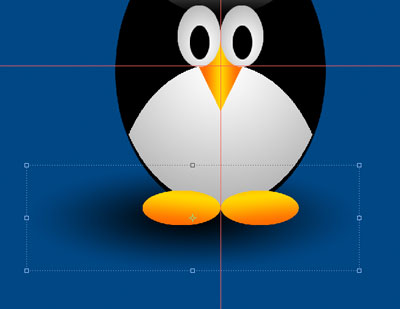
Make one more layer for the shadow underneath him. Create a radial gradient that goes from black to transparent. Don't worry about the shape at this point. To adjust the shape, use
Edit > Transform
You can also adjust the transparency of the shadow in the layers palette. Make sure your on the shadow layer and adjust the slider until you achieve the desired look.
To make the glare on the eyes, plot the shape you want for the glare with one of the selection tools. You can then paint white into the selection with a paint brush with a soft edge. Set a big brush so you just click once to spray in the white. You can also adjust the transparency of this layer the same way you did the bottom shadow.
All done! You survived. Well, almost all done. What do we do with this file now? Well, Let's save a PSD file with all the layers preserved in case we want to edit the image further.
File > Save As
Choose format to be Photoshop. OK.
Once that layered file is saved, we can save down a "flattened" version to be the final image. But first we need to flatten our layers. To do this:
Layer > Flatten Image
You'll now notice we're back to the default of one layer called background which has some attributes locked. You can now save as a tiff or a jpeg or whatever you would like.
Now we're done. Congratulations on your second Photoshop composite!

I changed my blue fill background color to a blue gradient to give it a nicer look.
Be patient with yourself, there's a ton to learn. Practice, practice, practice.